To make it easier to navigate through the many folders that you
will generate in the course of bioinformatics work, we need to add
some shortcuts to the Finder. Open the Finder, and choose Finder
--> Preferences.
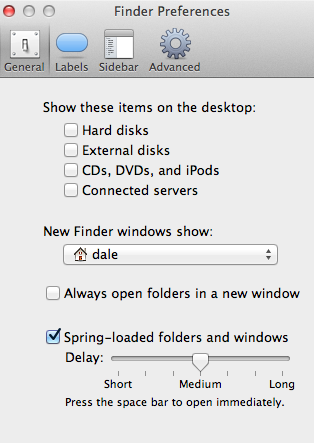
| In the General tab, set New Finder
windows show: to your user name. The example at right
shows settings for a user named 'dale'. Since
Macintosh is a Unix-based system, all users have what is
called a Home Directory, a folder containing everything that
belongs to the user on that computer. The Home Directory is
therefore the starting point for just about everything you
do. (Why this concept is hidden from Mac users is understood
only by the gurus at Apple). The Home Directories for each user are found in the /Users directory. Thus, dale's Home directory is /Users/dale. This will become important when you start using Unix commands in Terminal window.
|
 |
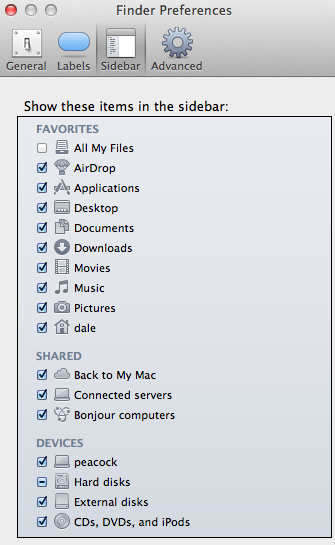
| More shortcuts to add to the Finder: In the Sidebar tab, check the box under FAVORITES with your Home Directory eg. dale. Under DEVICES, check the name of the computer eg. peacock. It is also advisable to uncheck the box in FAVORITES that says "All My Files". This view is useless when you have anything more than a handful of files. |
 |
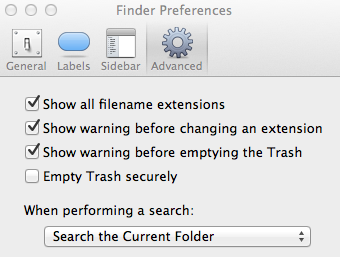
| Finally, in the Advanced tab, check "Show all
filename extensions". Also set When performing a search
to "Search the Current Folder". In bioinformatics we generate hundreds or thousands of files. Filename extensions are often crucial to knowing what is in a file. The default for When performing a search is "Search this Mac". That will take a lot of unnecessary search time, as compared to searching within a specific folder. |
 |
You can skip this step if you have
the BIRCH launcher  on your desktop, indicating that BIRCH is
already installed under your own account. on your desktop, indicating that BIRCH is
already installed under your own account. |
If you are on a multi-user system, and want to use a copy of
BIRCH installed centrally, you need to run the newuser script to
set up your account to use BIRCH.
In the finder, navigate to the folder containing birch (typically
/Users/birch/BIRCH).
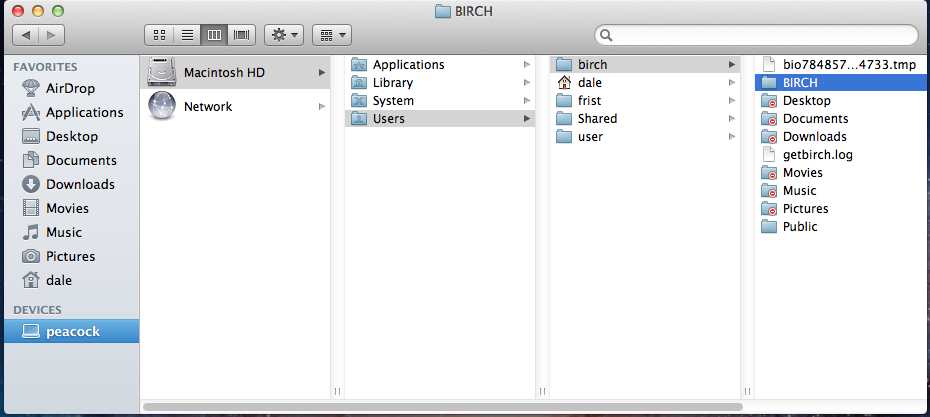
Go into the BIRCH/admin folder, and find newuser.
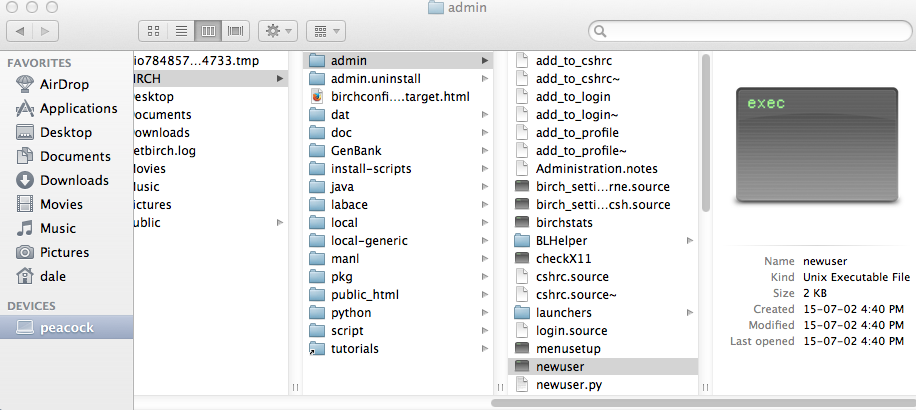
Double-click on newuser to run the script. You will see a console
window displaying the progress of the setting up your account to
use BIRCH.
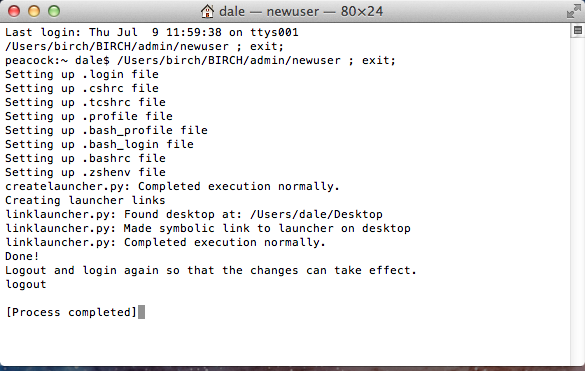
You can close this window after the process is completed. The
BIRCH launcher should now appear on your desktop.
newuser sets the path and environment variables
No special permission is needed to use BIRCH. It is accessible by
anyone with a valid Unix account. However, two things need to be
setup in order to use the programs. First, your $PATH must include
the directories in which BIRCH executable files are found.
Secondly, many of the programs need to know where to find data or
configuration files. The locations of these files are specified by
environment variables that are automatically set when you login.
newuser will add some lines to your .login and .cshrc and .profile files, which contain commands that execute each time you login. (Comparable to AUTOEXEC.BAT in DOS). These commands 1) set your path 2) set your environment variables, 3) set your prompt to display the current working directory and hostname.
All of these processes are made transparent to the user by
running the 'newuser' command.
Note: You could also run new user at the command prompt by typing:
/home/psgendb/admin/newuser
The next session has a few ways to customize your desktop that
will make your life more convenient when working in
bioinformatics.
Next: Adding power to
your Macintosh desktop
What if I want to remove BIRCH access from my Unix account?
To remove BIRCH access for your account, open a terminal window and type
/home/psgendb/admin/nobirch
This deletes the lines that were added by the 'newuser' script to your .login, .cshrc, .profile, .bash_profile, and .bash_login files. (All of these lines contain the string '#_BIRCH'). You can always restore BIRCH access by running 'newuser' as described above.