| |
updated Sept. 23, 2021 |
| >>>
This is a generic page for remote connection to a BIRCH
site. <<< >>> Edit this page, found in $BIRCH/local/public_html/remote/desktop/thinlinc/thinlinc.local.html, <<< >>> with information specific for your system. <<< |
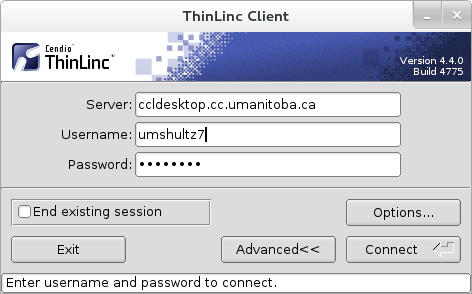
| 3. Enter your userid and password Type in 'ccldesktop.cc.umanitoba.ca' as the server. ccldesktop redirects you to one of three Linux servers, mars, venus or jupiter. Type in your userid and password, and click on "Connect" Usually, your userid is the part of the email address before the '@' symbol. eg. umshultz7. However, for many students, Thinlinc requires your full U of M email address eg. umschultz7@myumanitoba.ca. Use whichever one works as the Username. Your screen will switch to a desktop session running on the CCL Linux system. |
 |
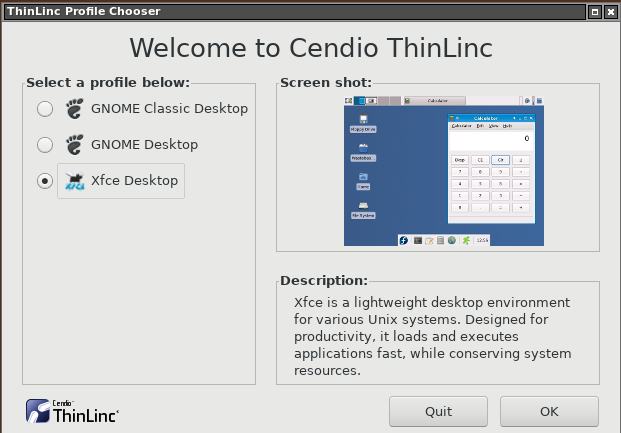
| Three desktop environments are available on
the CCL system. Since these tutorials assume you are using the Xfce Desktop, select "Xfce Desktop" in the Thinlinc Welcome menu and click OK. |
 |
| 4. Switching between Thinlinc and your
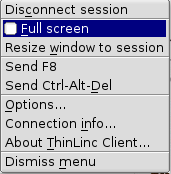
local desktop By default, your Linux screen fills the entire display. At any time during your Fullscreen session you can bring up the Thinlinc menu by pressing F8* at the top of the keyboard. The menu will pop up. Change to single window mode by unchecking "Full screen", as shown at right. Your thinlinc session will now be enclosed in a window, which can be minimized (_) if you wish to work on your Windows/Mac screen. To return to a full-screen session, move your mouse into the thinlinc window and press F8 again, and check the "Full screen" box. *On some keyboards, you may need to hold down the Fn key, and press F8. |
 |
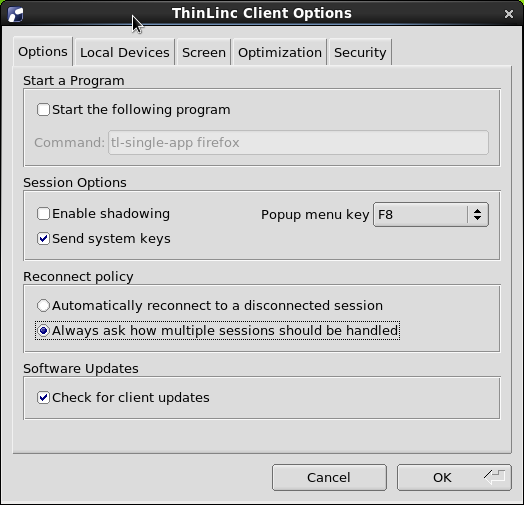
| The best way to ensure that you can reconnect
to a previously disconnected session is to open the Options
menu in the Thinlinc Client, and, under Reconnect Policy,
check the box that says "Always ask how multiple sessions
should be handled. |
 |
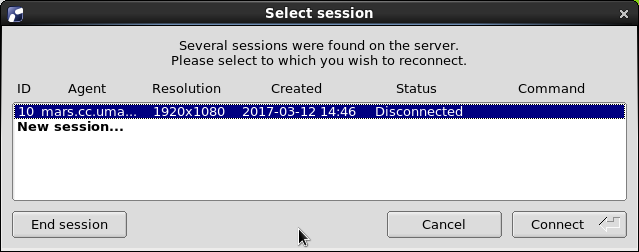
| The next time you log into the host, you will
see a list of sessions currently running on that host. Choose the session you wish to connect to and click on "Connect". |
 |