Navigation
|
|
|

Once the installer has been invoked, the console will
appear.
It will attempt to detect the platform, and is where you
will see things like:
- Error messages (a copy of the log)
- Download progress
|

Once the platform has been detected, the main installer
window ill open.
You have a few options:
- Default: simply click "Finish" to install with default
parameters
- Advanced:
- Select a directory for install log , or turn
it off (as you so please)
- Select "Advanced Install", click next (Finish button
will become "next")
|
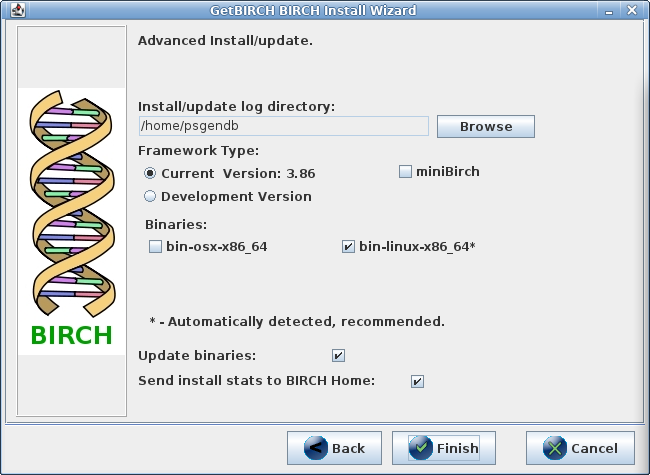
If you selected an advanced install you will have a few
options:
- Directory to install to:
- The default is your home directory, but you might
want to change this
- Installation type:
- Development Version: Only recommended for advanced
users, the Development version has new features, but
is not guaranteed to work.
- Binaries: The installer should have automatically
detected your binary type, but if you have a server
cluster with multiple architectures, select additional
binaries.
|
