The GNOME Desktop


A typical desktop

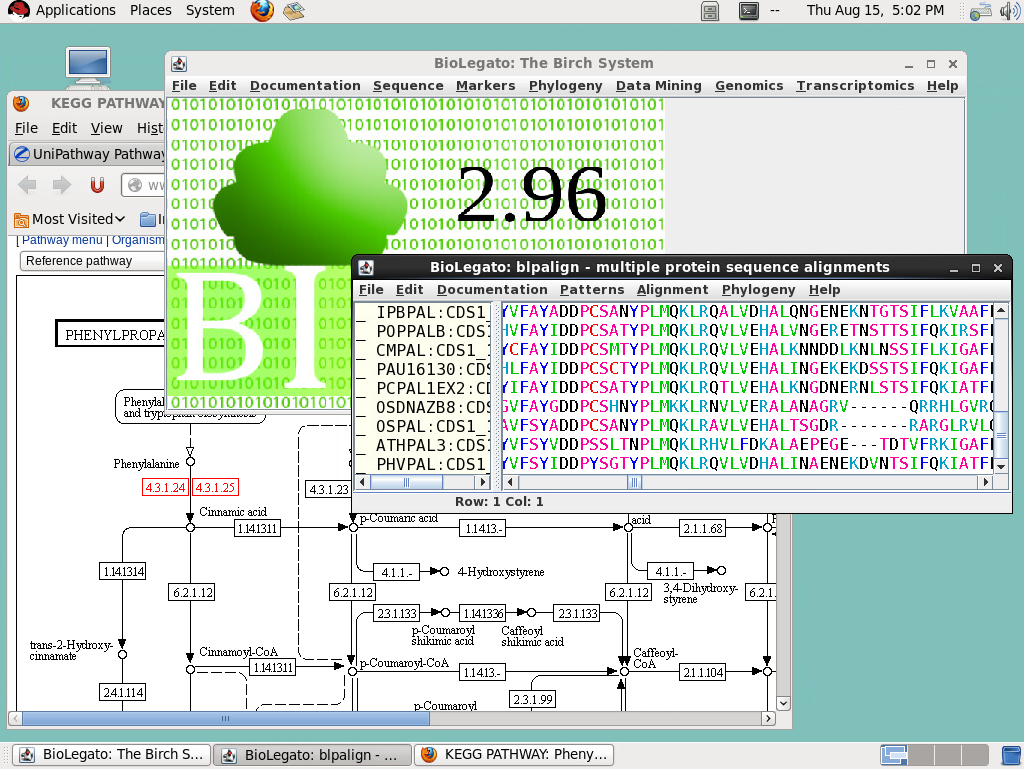
GNOME is a window manager, a program that governs the display of windows on your screen. The example shown above illustrates some of the items that might typically be found on the desktop.

  •  workspace - the background of the desktop

  •  Launch Menu - hierarchical menus for launching programs; some parts customizeable, 

  •  ControlPanel - a customizable, graphic menu bar for tasks.

  •  Terminal - window for typing Unix commands

  •  Textedit - text editor for ASCII files

  • Nautilus File Manager - create, move or rename files or directories

As many copies of a program or window can be present on the desktop as you wish.


The Unix Mouse

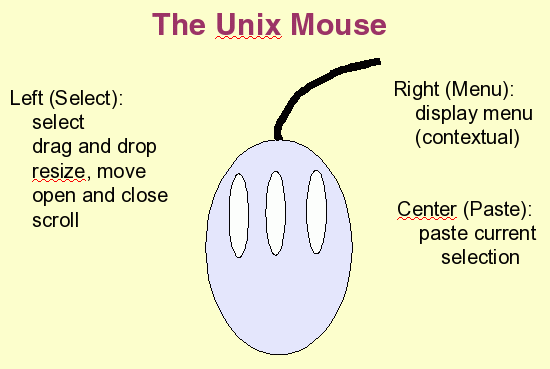
The Mouse in Unix uses 3-buttons. The left button is the Select button. Essentialy everything you do is done with the left button. The right button is the Menu button. Holding down the right button over any window or part of a window, or even the desktop background, will give you a context-dependent menu. The Center button is the paste button. If you select a block of text in one place, you can move the cursor to another place, press the center button, and the selected text will be copied into the new location. This is sometimes a DANGEROUS button, because it is very easy to accidentally select and past a large block of text! On some mice, the center button is also a wheel that can be used for scrolling.

Note: Some mice  are two-button mice. You can emulate the third button by holding down both buttons at once. Sometimes tapping the gap between the two buttons also works.


Customizing your desktop

All properties of the GNOME desktop are set in System --> Preferences.


Suggested desktop properties
To help you get started, here are suggestions for making GNOME easiest to use. As you get more proficient with GNOME, you can experiment with different settings until you are satisfied with how your desktop looks and functions.

Window focus

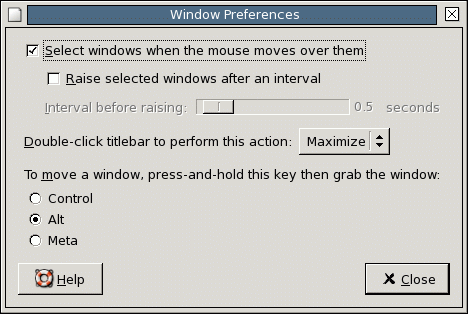
Choose System --> Preferences --> Look and Feel --> Windows.
The Windows menu governs the 'focus' of the screen, ie. where the keyboard and mouse take effect. By default, the 'active' window is chosen by clicking on a window. This will also bring that window to the front. However, the extra clicking required with these default settings can get tedious.

The best starting choices are to choose "Select windows when the mouse moves over them" . Make sure the box saying "Raise windows after an interval" is not checked. The combination of these two settings is usually the most convenient, and certainly the least frustrating for new users.


Window List Preferences

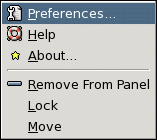
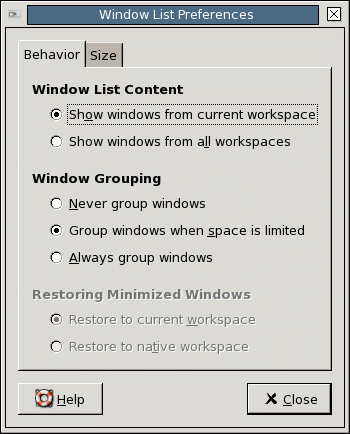
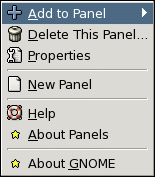
The control panel at the bottom of the screen contains a list of windows currently open. To make it easier to have a large number of windows open simultaneously, go to the vertical bar next to the window list on the lower control panel. Hold down the right mouse button to bring up the menu for the window list:


Choose Preferences, which will bring up the Window List Preferences. Select "Group windows when space is limited"


Create a launcher for the Nautilus file manager

The control panel at the top of the screen contains a set of icons for launching applications. To add a launcher for the file manager, do the following:

Open the menu for the upper panel by right clicking on the blank area of the panel.

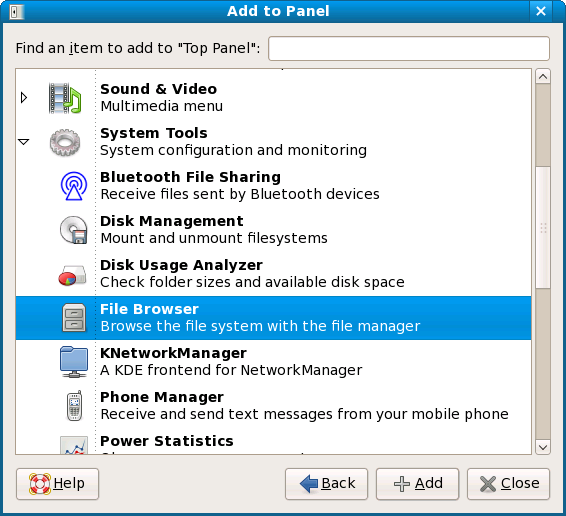
Choose Add to Panel --> Application Launcher (do NOT choose Custom Application Launcher). Click on the 'Forward' button. Now, Open the System Tools tab and choose File Browser. Click on +Add, and then Close. The File Browser icon will appear on the upper control panel.


By default, the File Browser displays each file as a large icon, giving no further information. It is much more useful to have detailed information about each file appear.

Open the File Broswer by clicking on the File Browser icon.

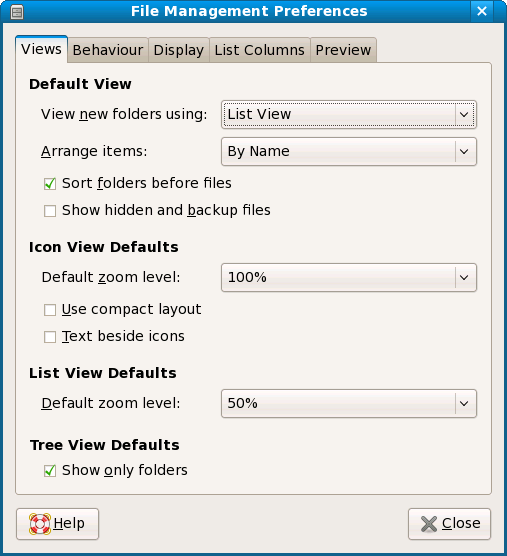
Next, choose Edit –> Preferences. In the Views tab, under Default View, set View new folders using: List View.


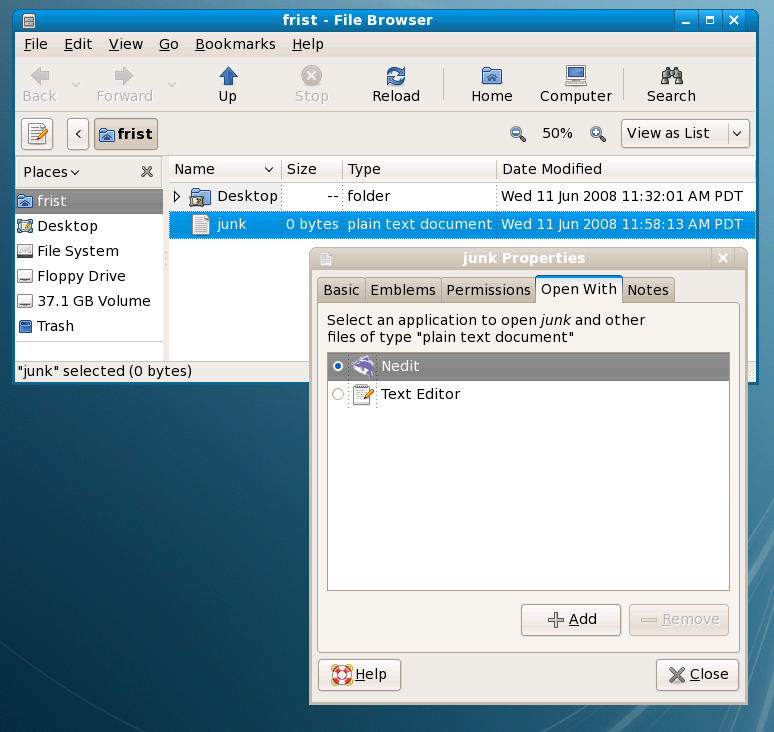
Choose Nedit as the default text editor

This will be done is two steps. First, we'll create an empty Plain Text File. Then we'll tell the Nautilus File Manager to use Nedit as the default application for opening plain text files.

If your File Browser is showing files as Icons, rather than displaying details, change the View widget in the upper right hand corner of the File Browser to View as List.

In the File Browser, choose File --> Create document --> Empty file. A file called new file will appear in the File Browser. To remind us to delete it later, it is a good idea to rename this file to 'junk'.

The new file will automatically be designated by the File Browser as a Plain Text file. Next, select the 'junk' file and right click to bring up a menu. Choose Properties. Click on the “Open With” tab and choose Nedit. This will cause plain text files to be opened with Nedit when you double click on them.

Q: What is a Plain Text File?

A: A Plain Text File, or ASCII text file is a file containing simple text, consisting of only letters or numbers. These files don't contain special formatting such as fonts, underlining, pagination, graphics, italics etc. While most application programs such as word processors, spreadsheets, or graphics programs store data in complex binary formats, most scientific programs store data in simple text. One of the consequences is that any text file can be opened for examination or editing by a generic class of programs known as text editors. On GNOME, gedit is the default text editor. On Windows, Notepad is the default text editor.

Q: Why don't we just use the default editor, gedit?

A: First Nedit is far more powerful than gedit. Secondly, gedit is threaded, and when you have several files open at the same time, it is impossible to get them to appear in separate windows. Gedit will force multiple files into tabs within a single window. Nedit lets you view several files in independent windows: a very important capability when working with data.


Add a Terminal Launcher

Go to the upper control panel and hold down the right button. Choose Add to Panel --> Application Launcher --> System Tools --> Terminal. Click on the +Add button. A terminal icon should appear on the control panel:


Add a Printer Manager to the Panel

The printer manager lets you monitor print jobs, cancel print jobs, choose a favorite set of printers to display, and even drag and drop files directly from the Nautilus file manager.

To add the Printer Manager, go to the upper control panel and hold down the right mouse button. Choose Add to Panel --> Application Launcher --> Preferences --> Default Printer. Now, you can print text or Postscript files by dragging them onto the Printer icon :


Important notes:

1. Only text and PostScript (.ps) files can be dragged and dropped. For specialized file types (eg. .pdf, .jpg, .gif) you need to open the application and print from the application.


BIRCHReturn to BIRCH home page

SUGGESTIONS for topics to be added to this list are welcome! Send email to psgendb@cc.umanitoba.ca