Tutorial: Designing PCR primers to amplify a gene from genomic DNA |
March 21, 2025 |
Tutorial: Designing PCR primers to amplify a gene from genomic DNA |
March 21, 2025 |
| cd tutorials mkdir primerblast cd primerblast |
go into tutorials directory create a directory called primerblast go into the primerblast directory |
| Since
we'll need to use NCBI PrimerBlast, it's best to start by
finding the gene on the NCBI web site at https://www.ncbi.nlm.nih.gov.
Using the search panel at the top of the page, Set the
database to Gene, and type in the search term LepR3 [Text Word] AND Brassica napus [ORGN] as shown: |
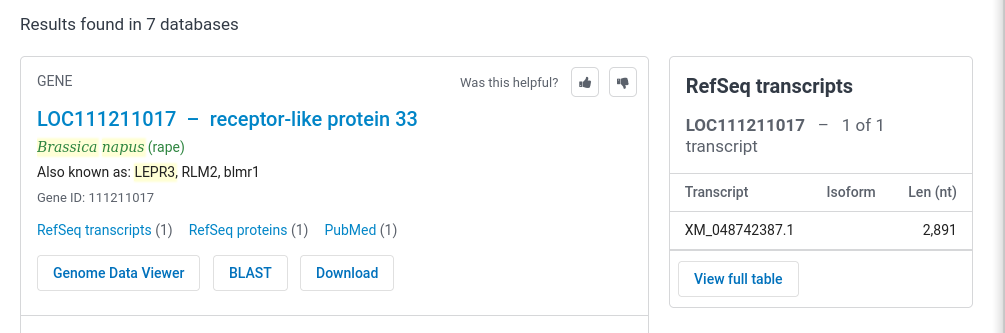 |
| Click on "LOC111211017..." to go to the page
for this gene.The
top part of the results are presented at right. Note that
the formal annotation for this gene lists it as a
receptor-like protein. This makes sense, since most plant
disease resistance genes are Toll-like receptor protein
kinases. The most recent release of the genome annotation tells us that this gene is found on Chromosome A10 (ie. in the A genome of B. napus.) |
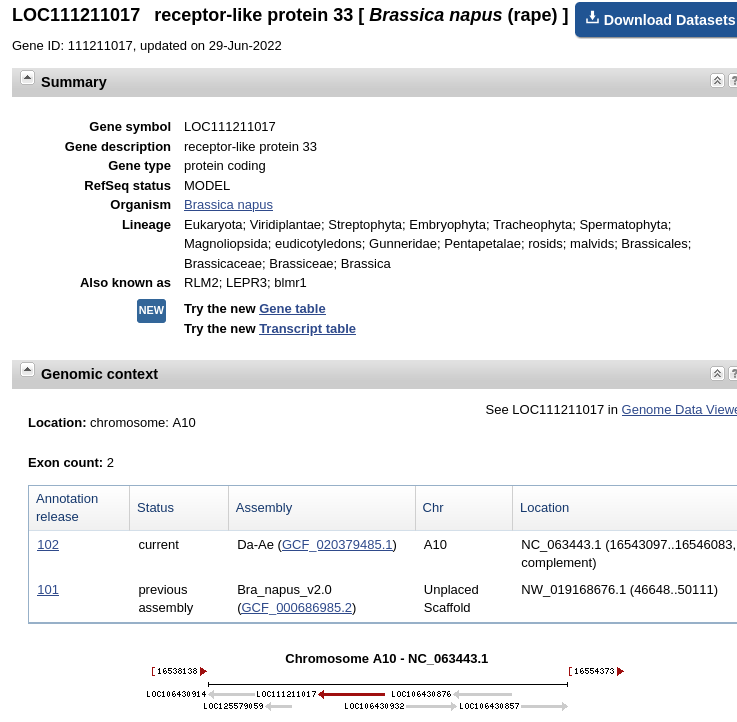 |
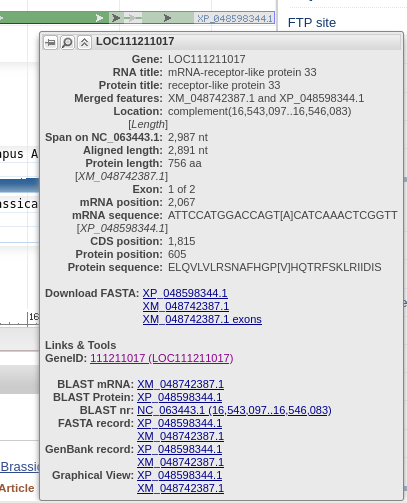
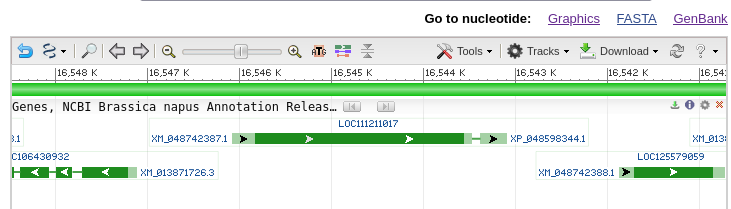
| The
gene map shows that there are 2 exons separated by an
intron. If you mouse-over the first exon,
represented by the green line with arrows, information
about exon 1 will pop up as shown at right. You can also
mouse over the intron or exon 2 (data not shown). The default display shows the gene and some of the flanking region spanning nucleotides 16,543,097..16,546,083. Note that the view is shown with respect to the orientation of the LepR3 gene, which is encoded on the reverse strand. Therefore, the coordinates in the genome viewer go from high numbers to low numbers, going left to right. |
 |
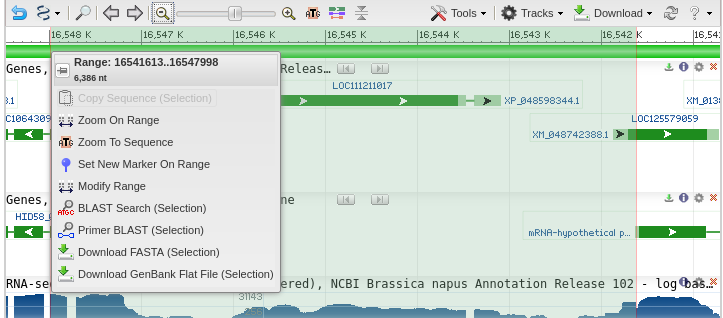
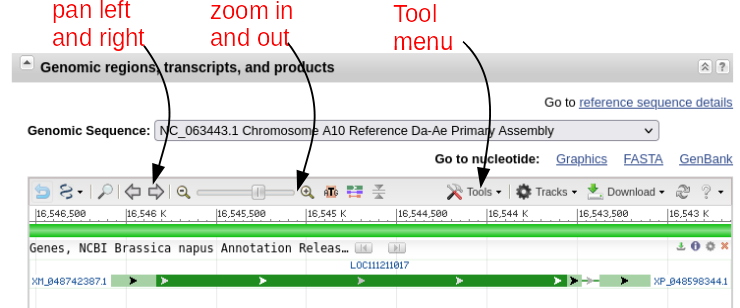
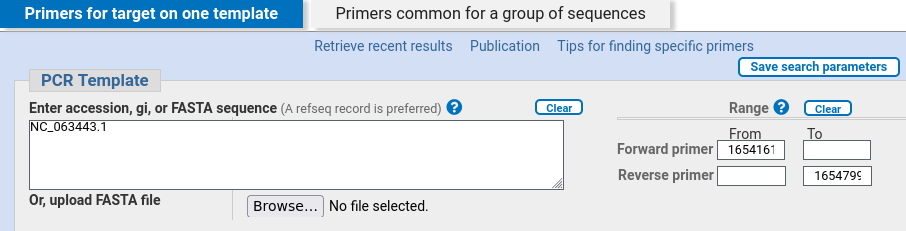
| Primer-BLAST lists the accession number of
the genomic scaffold, and the coordinates of the selected
region are shown in the Forward primer and Reverse Primer
boxes. |
 |
| In
the Primer Parameters section, we set the Minimum PCR
product size to 4500 (ie. a 2987 bp gene plus 1000 bases
upstream and 500 bases downstream, rounded to 4500).
So we want a primer of at least 4500, and to allow
PrimerBlast a large enough area to find good primers, set
the maximum to 6500. |
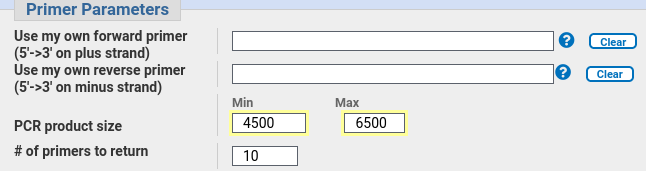 |
| Primer-BLAST chooses an Excluded region using
a starting point and a length. Therefore, type in 16542597,5000 (No commas are allowed in large numbers such as 16542597). |
| How does Primer-BLAST work? The search for primers is essentially a 2-step process: 1. Use the Primer3 program to design candidate primer pairs for the target sequence. Almost all of the parameters to Primer-BLAST are actually parameters for Primer3. 2. Use MegaBLAST to search an NCBI database for matches to the primer. Any good matches to genes in the database other than the target sequence will cause candidate primers to be discarded. This step is critical to ensure that the final primer pairs will amplify the desired target, and no other sequences in the genome. By default, the RefSeq mRNA database is searched for unwanted matches. |
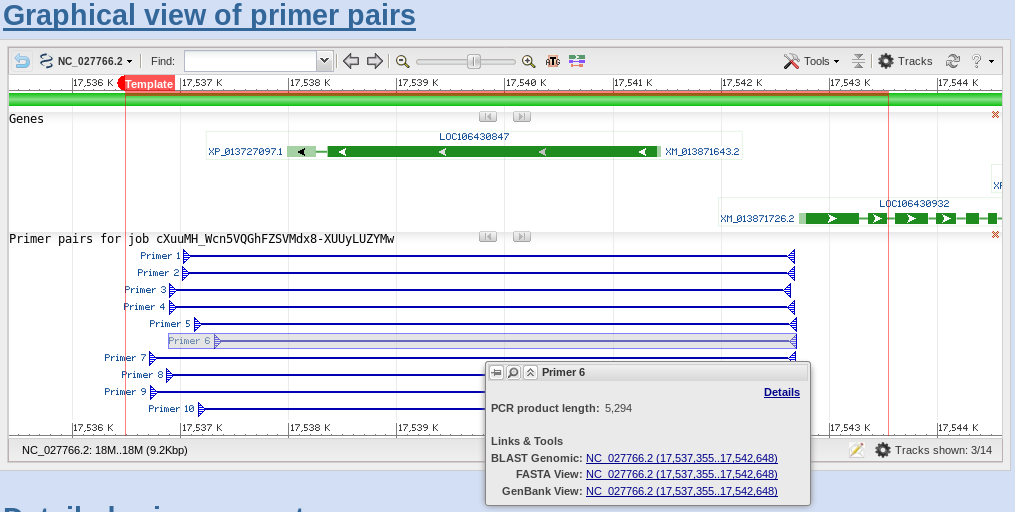
| If
you scroll down to the Detailed Primer Reports, you will
see the sequences of the primers, as well as other data on
the PCR primers. For comparison, results for Primer pairs
6 and 7 are shown. |
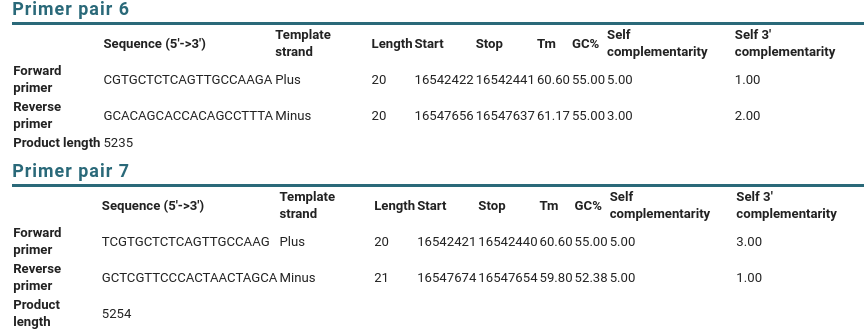 |
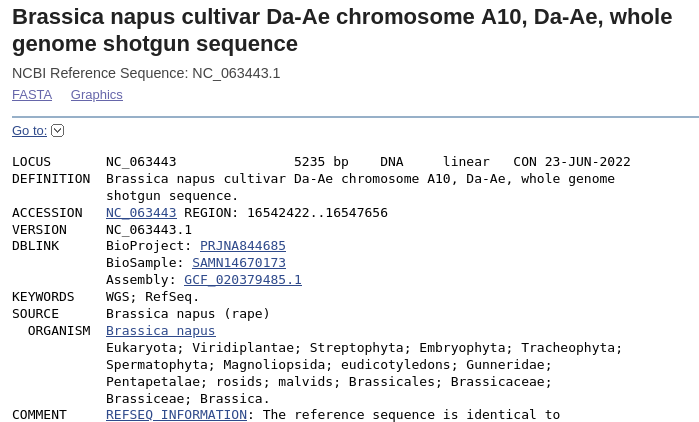
| Note
that the Accession number is the same as the scaffold, and
the region shown in this file is the 5235 bp fragment
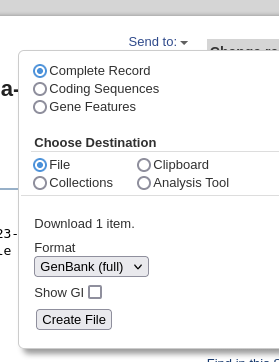
going from 16542422 to 16547656 . Save the file using the Send menu in the upper right corner, and choose Complete record, File, and GenBank (full). Click on Create File to save, and save as LepR3-PCR.gen.
|
 |