BIRCH

BIRCH

Using a Unix desktop remotely from a Windows PC


This tutorial assumes that you already have set up your Unix account to use vncserver.
See Setting up your Unix account to run vncserver. It is written with the assumption that you will use Putty as the command line client to connect to an ACN Unix server at the University of Manitoba. The SSH client for Windows should work similarly to the Putty example shown here.

1. Start a VNC session on the remote Unix server

Launch Putty from the Windows Start menu eg. Start --> INS Programs --> Internet --> Telnet --> Putty. A Putty window will pop up. Get the Putty menu by right-clicking on the header bar.


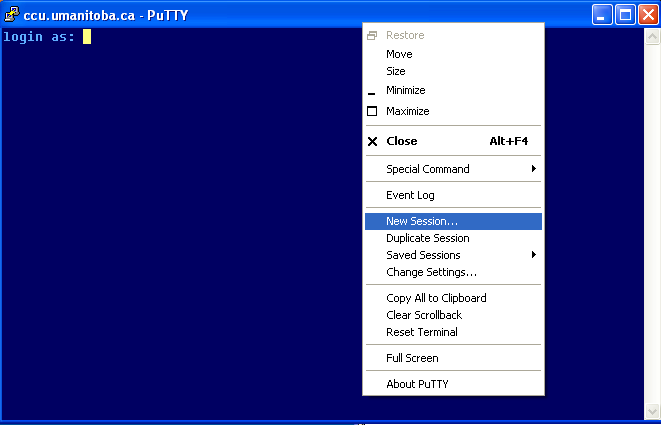
Choose New Session. In this example, the Host Name is set to 'mira.cc.umanitoba.ca'. We are using the SSH encryption protocol, which is the standard for highly-secure communications across the Internet. You can save these settings by typing 'mira' in the Saved Sessions box and clicking on Save.

Note: The first time you connect to a remote host from a specific PC, you will get a message beginning "The server's host key is not cached in the registry.....".  This message is asking if you want to store the unique security fingerprint so that in future sessions on the same remote host, that host can be identified. It is usually save to click "Yes" to this message.


Login to the remote host

login as: frist
Using keyboard-interactive authentication.
Password:
Last login: Wed Aug 19 13:30:15 2009 from agpc26.cc.umani
Sun Microsystems Inc. SunOS 5.10 Generic January 2005
mira [Omicron Ceti] a variable star in the constellation Cetus

For pointers to useful information, type: help
To change your password, type: passwd

Erase set to delete.
+++++++++++++++++++++++++++++++++++++++++++++++++++++++++++++++++++++++++
B I R C H ANNOUNCEMENTS

15 Aug 09 GenBank 172.0 is now online.

BIRCH WWW site: http://home.cc.umanitoba.ca/~psgendb
NEWSGROUP: man.molbio - discussions of BIRCH, general mol. bio. in Manitoba
+++++++++++++++++++++++++++++++++++++++++++++++++++++++++++++++++++++++++

{mira:/home/plants/frist}

Start vncserver.
{mira:/home/plants/frist}vncserver

New 'mira:2 (frist)' desktop is mira:2

Starting applications specified in /home/plants/frist/.vnc/xstartup
Log file is /home/plants/frist/.vnc/mira:2.log

{mira:/home/plants/frist}

Make a note of the number after the colon. This will be a number between 1 and 99, referring to the port that is being used for this session on the remote host. In this case, :2 refers to port 5902. On Unix systems, ports 5901 through 5999 are reserved for VNC.

In part 2, we will show how to change your Putty session so that port 5902 from our PC is connected to port 5902 on the Unix host. All traffic between these ports will be encrypted, ensuring a secure vnc session.

2. Set up port forwarding for a secure session

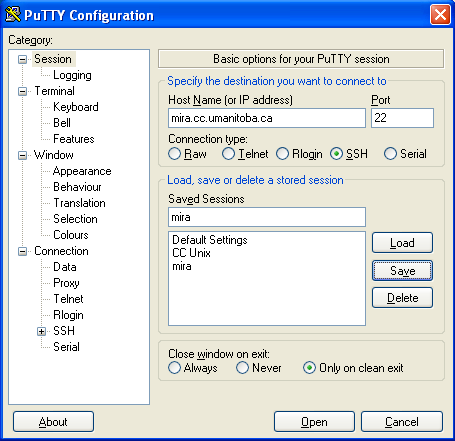
Go back to your Putty window that is connected to mira, and right click on the header bar. Choose Change Settings. Next choose Connection --> SSH --> Tunnels.

Enter '5902' in the Source Port box. This tells which port to use on the PC. (If that port was in use, any other port would be okay.) Next, in the Destination box, type in 'mira.cc.umanitoba.ca:5902'. Click on the Add button to add this connection to the mira profile.  Click on Apply. Your Putty connection will now allow port secure port forwarding, which will be used by VNC.

3. Connect to your VNC session using vncviewer

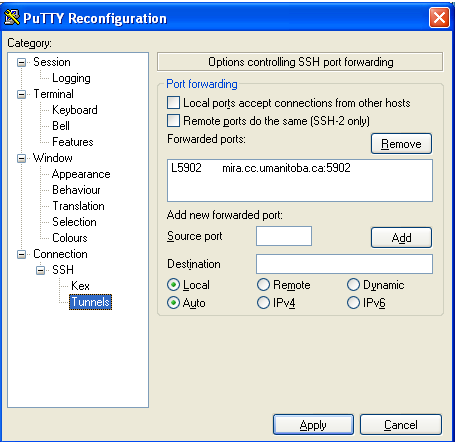
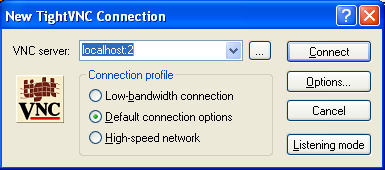
Start a vncviewer session on your PC, and connect to the vncserver session on the remote host.

Start --> INS Programs --> Internet --> VNC Viewer. In the VNC server box enter 'localhost:2'. This tells vncviewer to connect to port 5902 on your PC, which is already connected to the vncserver job running at mira.cc.umanitoba.ca:5902.


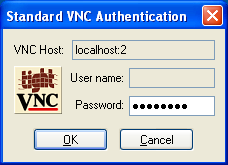
The password prompt pops up. Type in your VNC password. This is NOT necessarily your Unix password. It is the password that you set the first time you started vncserver, or whenever you most recently ran vncpw.


Your vnc session will appear in a new window.


You can log out and log back into your VNC session as often as you wish.

If you kill your vncviewer or your Putty session, the vncserver session is still running on the server.  For example, you could be in the lab working on a file in a vnc session, and decide to go home. You can kill your vncviewer  in the lab, and when you get home, login to the vncserver just as you did at the lab. The desktop in the vncviewer window will be precisely as you left it, with all programs open where they were, and the cursor in the same place as it was when you killed vncviewer.

The one thing to remember is to kill your vncserver session when you're done with it. It's easy to forget that you already have a session running, and start another session. Many programs, such as Firefox and mail programs, can encounter problems if you have multiple instances of those programs running simultaneously.

4. Terminate your VNC session when done

Although VNC is fairly secure, it's asking for trouble to be logged in, in any fashion, when you're not doing anything. When you're done,  kill the VNC session.

Example:  vncserver -kill :1

On BIRCH systems, you can also use the shortcut

vnckill  :1

Remember, if you launched  vncserver on mira, you must log into mira to kill the job. You can't kill it on merak, toliman, etc.

DO NOT LEAVE VNCSERVER RUNNING WHEN YOU AREN'T USING IT!

Aside from being a security hole, having numerous vncserver jobs running can sometimes confuse desktop systems such as GNOME, and can sometimes lead to corruption of configuration files.


Please send suggestions of comments regarding this page to