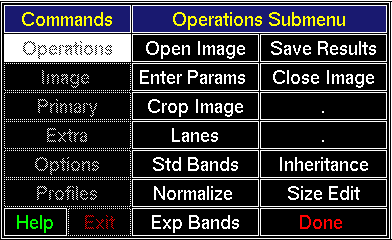
Figure 3.1: Commands Menu (left) and Operations Submenu (center and right).
Assuming you have all the support files in place and have properly
set the environment (if you don't understand this, consult your
system manager or the person who installed this software),
begin by typing dui [return] on the command line.
On your terminal, the program will print the
DISPLAY and XAPPLRESDIR environment variables or print an error
message. If the environment is properly set, the screen should
pretty much be covered with the dui application.
From here, very little typing is done. Most interaction is
performed by moving the pointer to a menu item and clicking
mouse button 1 (MB1).
Nearly all interaction with the program is through the Commands Menu
in the upper left of the screen. Selection of a Commands Menu item
brings up a submenu just to the right of the Commands Menu. Control
remains with the submenu until its
[Done]
button is pressed,
at which time the submenu disappears. While a submenu is displayed, the
Commands Menu is darkened to show that its items are "insensitive".
Begin, now, by clicking [Operations] and observing the
Operations Submenu to the right of the Commands Menu as shown in
Figure 3.1.

Figure 3.1: Commands Menu (left) and Operations Submenu (center and right).
Forward to Chapter 3, section 3.1
Forward to Chapter 4 Table of Contents