

The Menu Bar is a home for a number of Menus that help user to load in Spotfinder and save images, grids, and data. The settings and help menus are hosted on the Menu bar also.
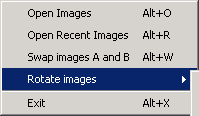
The Image Menu can be used only for the loading images in the program. Menu command Load Images launches the input image files section dialog. Depending on the number of channels selected in settings user needs to select an appropriate number of image files for input in the File Open Dialog. Use CTRL key to make this selection from the list of files. The order in which images are placed in channels A, B and so on depends not on the selection order but on file names. Image name filter sorts the input files alphabeticaly according to theirs filenames. This mechanism garanties that the images having suffices Cy3 and Cy5 in filenames are loaded in channels A and B in the same order. This also is true for suffices 532 and 635 used by Axon GenePix scanning software to name files.
Currently Spotfinder supports multi-tiff images files; therefore the multi-tiff file created by Axon scanner can be loaded with just one click. The order of files in Axon multi-tiff image file is defined at the moment of file creation and cannot be changed by applyig Swap Images procedure (see below).
Menu command Open Recent Images loads the most recent set of images analyzed by Spotfinder on user desktop.
Menu command Swap Images A and B allows to swap images in channels A and B if default image order is not appropriate.
Menu command Rotate Images is usefull when original image was scanned not in traditional way from slide top to the bottom. We consider the traditional image orientation where the image of size the standard microscope slide is oriented vertically such that the image width is smaller than the image height. This command rotates all loaded images by 90 degrees in clockwise or counterclockwise, depending on user choice. Remember that the image rotation results in generation of output MEV file with orientation different from originally loaded image . It may require the remapping of original annotation if such MEV file is used in further analysis.
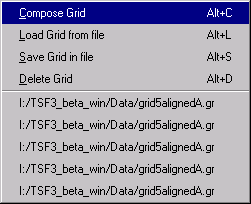
The Grid Menu provides a set of commands to create, delete, save, and load grids used in program for analysis.
The Compose Grid menu command launches a dialog for creating grid from scratch.
See ComposeGrid page for more details.
The Load Grid from file menu command brings up file dialog to select platform independent grid file created and saved previously by Spotfinder.
The Save Grid to file command allows user to save the currently active grid in platform independent grid file.
The Delete grid command deletes the active grid.
Since introduction of Undo/Redo support for grids in version 3.1.0 the active grid should be understood as currently visible on Analysis page.
The list of five recent grid files is shown at the bottom of the Grid menu. User can pick any of file in this list for quick loading. These file names are stored in program settings when program is closed and can be accesible in the next program session.
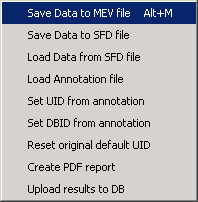
The Save Data to MEV file command saves the current dataset to MEV file. See MEV file for details.
The Save Data to SFD file command saves data in platform independent binary file. The SFD file holds not only information available in MEV file but all raw data and the information about spot contours.
The Load Annotation file command loads annotation data from TIGR type annotation file (*.ANN) or Axon annotation file (*.GAL). Remember, if the image was rotated by using operation from image menu the annotation file has to be remapped in accordance with the image geometrical transformation.
The Set UID from annotation command replaces default UIDs in first column of the MEV data table on Data Pagewith UIDs from annotation file.
The Set DBID from annotation command adds DBID column at the end of MEV data table on the Data Page and sets DBIDs from annotation file.
The Reset original default UIDs command restores original IDs on the first columns of the MEV Data table. The MEV file created by Spotfinder is the WYSIWYG type object for MEV table in Data Page .
The Create PDF report command writes PDF report for processed images. PDF report is three pages document designed currently for two colors array slides.
The Upload data to DB command creates temp MEV file for current dataset in program buffer and starts SpotfinderDBclient, which in its turn launches the database upload session. The SpotfinderDBclient is written in java and can be installed not only locally but on any machine that can be reached through the local network from host machine. See Database Operation for details.

Currently Settings Menu has only two commands: General Settings and Database Settings. It can be extended in future.
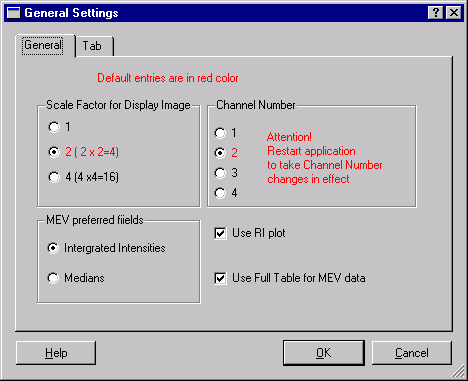
The General Settings dialog was designed for making changes in program settings. Programs accepts all Settings from this dialog without restart except Channels number. The change in Channel Number requires user to close program and restart it. All other settings will be taken into effect during subsequent program operation. The program settings are stored locally when program is normally terminated. The settings are not saved if program is crashed, therefore it is better to close program and restart to save changes in settings.
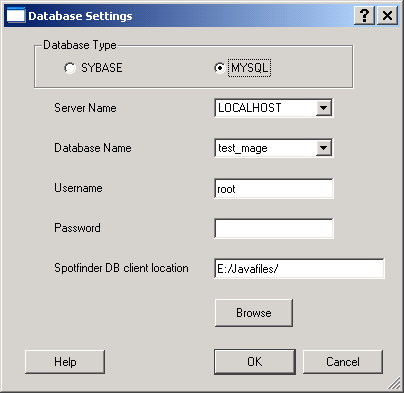
The Database Settings dialog is used to set and change the parameters needed for upload of the data generated by Spotfinder to Database. See Database operation for details. All database settings besides password are stored locally when program is normally terminated. The settings are not saved if program is crashed. Password is stored in program buffer for use in the current Spotfinder session only.
Depending on the database type user should select SYBASE or MYSQL.
SYBASE
TIGR users should use SYBASE since this is a TIGR home database. The server should be set to SYBTIGR, which hosts all TIGR production microarray databases. TIGR users may set SYBIL for work with one of the test databases in TIGR. As username and password TIRG database userID and password should be used. Make sure that Spotfinder DB client location is set correctly and point to the current location of SpotfinderDBclient. The default location is the same as Spotfinder executable file. However user might choose to move the DB client ( SpotfinderDBclient.jar file) along with DB drivers to another location on site network. We recommend to leave default setting for Spotfinder DB client location.
MYSQL
MYSQL microarray database was designed for users outside TIGR and available for download from TM4 project web site www.tm4.org. If MYSQL default installation is performed , which is local, the server name should be LOCALHOST and the default demo database name is test_mage. The default user name and password are root. Make sure that Spotfinder DB client location is set correctly and point to the current location of DB client. The default location is the same as Spotfinder executable file. However user might choose to move the DB client ( SpotfinderDBclient.jar) along with DB drivers to another location including another machine accesible from user machine through the network.

There are three commands in Help Menu.
About brings up a dialog with Spotfinder license information.
Help opens this interactive html help document (the one user reads now) in separate window. The keyboard key F1 does the same.
What's This command changes mouse cursor to a question mark. When user point this cursor to a some control or dialog on program GUI and click left mouse button the small window with the short explanation for that control appears. Some of these explanatory texts have additional hyperlink, which redirects user to the specific place in Spotfinder html help system.