Bayesian Network Analysis
(Djebbari and Quackenbush, 2008)
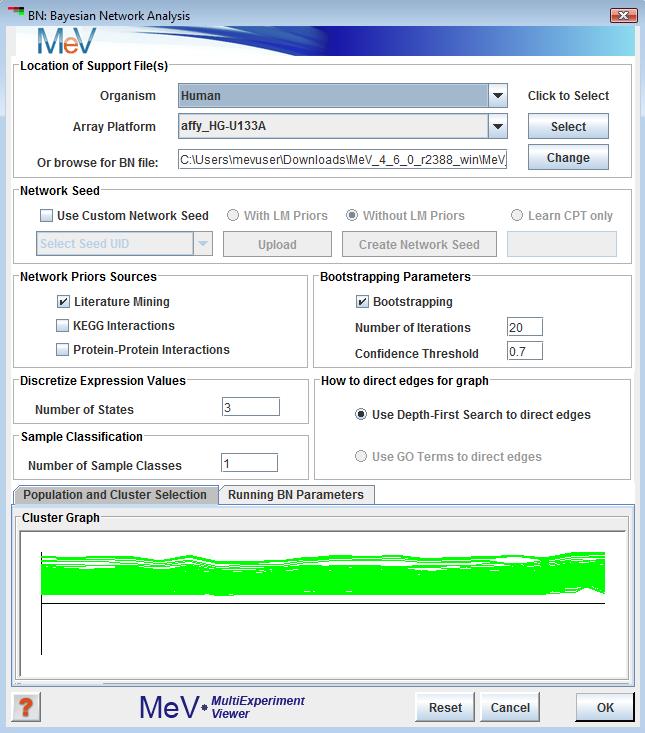
Selection this analysis will display the following window. This window collects all the parameters and inputs required to run the analysis. All the options in this dialog are explained below.
This option allows users to select the location where all support files needed to run BN. A description of files required can be found (see appendix for BN file descriptions).
If this option is selected the user is expected to provide a file representing network. The file should contain a list of edges, one of each line, and the nodes are separated by a tab. The identifier of the node should be one of the following provided in the drop down identified as “Select Seed UID”. Directionality is assumed in each edge specified such that node_A tab node_B is read as node_A to node_B. Cycles are not allowed. A network seed can also be built from using the “Create Network Seed” button. It allows user to create list of edges selecting nodes from the data directly. This option is limited in feature.
Network seed can be used in one of the three ways:
The checkboxes provide the users to select the source of Bayesian prior probabilities in constructing a seeded network. Currently Literature Mining and KEGG priors are available. The Protein - Protein Interaction as a source of priors is still under development.
As of now, the KEGG support files are automatically downloaded from TN4 website by the application. The user is prompted for Species information if annotation is not available. All other prior sources must be made available.
The data mining algorithm requires that the data be discretized into bins before it can be evaluated for network structure learning.
It is strongly recommended that user selects the default value of 3, which means the data can exist in 3 states:
Under expressed
Over expressed
Unchanged
The algorithm functions and reports meaningfully if the 3 state rule is followed.
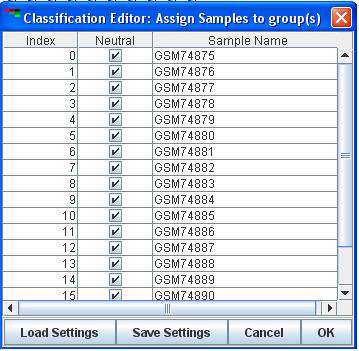
The samples or experiments can be classified based on some knowledge that the user might have and the user might want to preserve the classification while learning the network structure. In that case the user might want specify a numerical value > 1 denoting the number of groups the samples belongs to. The default is 1 or all belonging to one class.
that the user is presented with a Classification Dialog where samples can be assigned to group of users’ choice. The sample classification dialog shows up once the user navigates from the main dialog by hitting OK. If number of classes is chosen as one the classification dialog is not shown. A node by the name of “CLASS” shows up in the network which captures the effect of sample groups on the network. Once the network is displayed the “CLASS” node behaves and can be treated as any other node in the network. The CLASS node has no annotation.
The algorithm uses DFS or Depth First Search to connect nodes in the initial seeded network. For large networks with lots of nodes this can take a while to complete. The GO Term option of directing edges is not yet fully developed.
The user has the option of bootstrapping the samples to generate random networks. This feature is optional. This panel allows the user provide the number of time random samples will be generated in the box.The box allows defining a confidence level cut-off. The default is 0.7 means the algorithm will select an edge if it
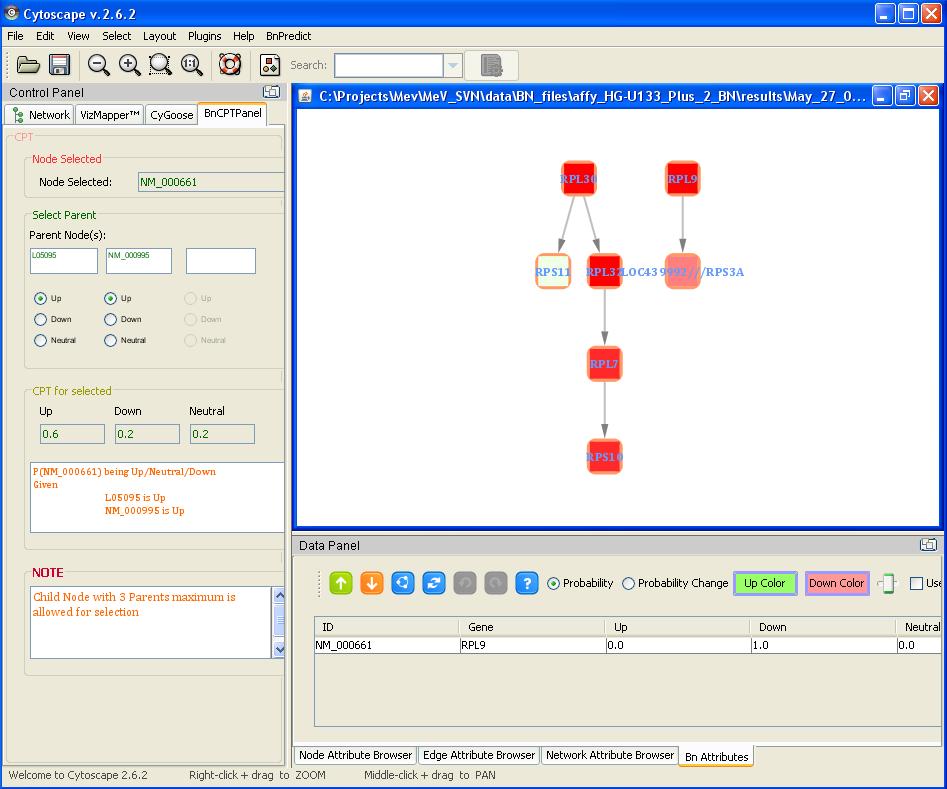
that if bootstrap is chosen, the user is given a chance to play with diffrent cut-offs after the algorithm runs via a small dialog box. It creates new networks for each new threshold that can be viewed in Cytoscape via Gaggle broadcast.
The user has to choose a cluster that BN algorithm would use to run the analysis. By default the first cluster is highlighted.
, that there is max limit in terms of number of genes that this algorithm can handle. If a cluster is chosen that exceeds the maximum genes limit an error window is displayed showing the maximum allowable number of genes. At this point the user can choose a new cluster, if one is already defined and is below the limit. If a cluster of allowable size is not defined, the user needs to cancel out of BN window, create new cluster(s) and then launch the BN Analysis window again.
This tab allows the user to customize some advanced options of the algorithm. Most users would be OK to accept the default settings in this panel. Below is a concise description of each available option:
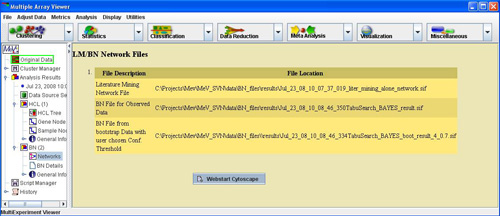
The BN viewer displays the network file names and locations that were created during the analysis. It also shows the ‘final’ network that the user selected from the bootstrapped networks. On Right Click it displays a popup menu to launch Cytoscape via Webstart with all files created.
The following result files are stored in the {..}\results folder. Where {..} represents the directory where the BN/LIT analysis supporting files are located.

Once the analysis completes the following small window is presented. The buttons/options are explained below:
button:This button shows up only if bootstrapping option was selected as an option in the initial BN parameter window. This shows the bootstrapped resulted network with the confidence threshold as set in the initial BN parameter window. On clicking this button the resulting network is shown in Cytoscape. If Cytoscape is already open it adds another network view or else it launches the application. The result network window will have a title with the following format:
button: The bootstrapped network can be viewed for different confidence threshold (70%, 80%, 95% etc) by changing the value in the text box preceding the button. The value should be a float where 0.7 means 70% confidence, 0.95 means 95% confidence. Once the desired threshold is entered, by clicking the “Update Network” button the resulting network can be viewed in Cytoscape. Note: It does not update previously existing network at a different threshold but adds a new network with the specified threshold. The result network window will have a title with the following format: