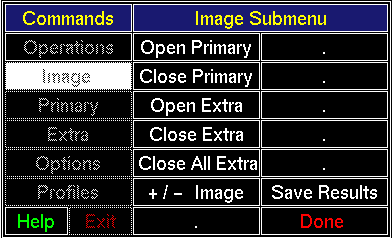
Click [Image] in the Commands Menu to open the Image Submenu. The Commands Region of the screen should like Figure 4.1. The Image Submenu buttons are explained below.

This is the same as [Open Image] in the Operations Submenu. Its presence in the Image Submenu is historical.
This is the same as [Close Image] in the Operations Submenu. Its presence in the Image Submenu is historical.
An extra image, that is, not the Primary Image, may be displayed at any time, provided it is referenced through an import file. Any number of extra images may be displayed at once and can be moved around in the Image Region. Typically, lane images (section 5.4) are displayed next to a lane in the Primary Image.
To remove an extra image from the display, click [Close Extra] , then move the pointer to the image to be removed and click MB1. If you are removing more than one extra image, simply move the pointer to each and click MB1.
Clicking [Close All Extra] removes all extra images.
Declare the primary image as positive (gel) or negative (autoradiogram). Such a declaration is usually handled at the time the primary image is loaded, but this button allows it to be changed. Mostly, this button is historical.
This is the same as [Save Results] in the Operations Submenu. Its presence in the Image Submenu is historical.
Clicking [Done] removes the Image Submenu from the display and activates the Commands Menu.
Forward to Chapter 4, section 4.2