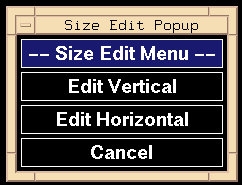
Fragment sizes may be edited on an intralane or across-lane basis. Both marker and experiemntal band sizes may be edited. This size-edit feature is designed for making small, incremental changes to sizes; you may find it cumbersome for making large changes. For large changes, editing of the placement of the band is recommended. Selecting the Size Edit button pops a menu from which one chooses horizontal (across lanes) or vertical (intralane) editing. From the Commands Menu, click [Operations] ; then click [Size Edit . The Size Edit Popup appears, as in Figure 5.5. The [Edit Vertical] and [Edit Horizontal] buttons are explained below. Clicking the [Cancel] button removes the Size Edit Popup.

[Edit Vertical] -- edit within lanes
[Cancel] -- cancel size edit
If you click [Edit Vertical] , the Size Edit Popup menu disappears. A Vertical Size Edit Popup (Figure 5.6) appears to the right of the image. Clicking its [Done] button at any time removes this popup and returns control to the Operations Submenu. Everything below the \fbox{Done} button refers to a single lane within the image; by default, the leftmost lane of the image is represented when the popup first appears.

Below the [Done] button are 3 colored stripes containing the
labels from the lane-label, inheritance, and lane index stripes for
the lane involved. In Figure 5.6: the lane-label is "M" (for marker lane); the
inheritance-label is blank denoting that this lane is not a family member; and
the lane-index label is "0" (index position "0").
Lanes are changed with 5 buttons below the labels.
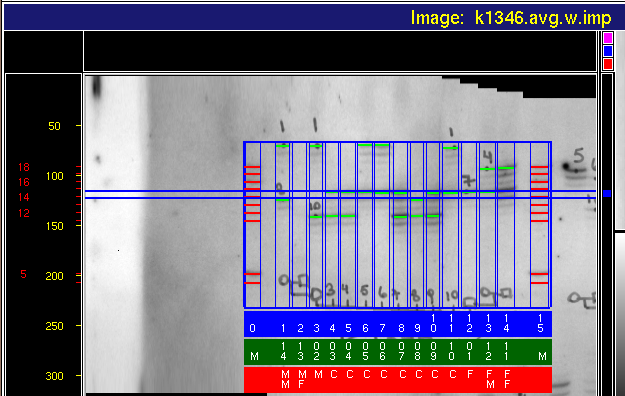
If you click [Edit Horizontal] , the Size-Edit popup menu disappears. Two thin blue horizontal lines span the image, extending from the left of the image to the top and bottom of the scroll thumb in the vertical scrollbar to the right of the image. By moving the scroll thumb up or down with MB2, the thin blue lines move along. An example appears in Figure 5.7. These lines bracket a region of interest whose fragment sizes appear the Horizontal Size Edit Popup as in Figure 5.8. The blue lines are separated by a vertical distance of 7 pixels.

The Horizontal Size Edit Popup appears above the image. This popup consists of a rectangular grid of tiles. The grid width corresponds to the number of lanes on the image. The grid height is 10 tiles; the top 3 tiles are for representing the same labels as those of the lane-index, lane-label, and inheritance stripes for a given lane while the bottom 7 are for fragment sizes of bands appearing between the two blue horizontal lines in that lane. The 7 tiles correspond to the 7 pixels separating the blue lines.

Move the scroll thumb up or down until it includes several
bands in several lanes. Note the sizes in the tiles within the popup
above the image. To change the value of any fragment size, click in
the tile containing that size. Appearing above the tile
will be two small buttons: [+] [-] .
Click in either of these and the size will increment or decrement by one.
You may continue clicking (incrementing or decrementing) until
the size is correct.
The upper limit of increment is 1 less than the size of the
next band within the lane; if there are no higher-sized bands, there is no upper
limit. The lower limit is 1 more than the size of the next lower band; if
there are no lower-sized bands, the lower limit is 0. Size changes are effective
immediately and cannot be automatically reset.
>
Above the grid are three buttons:
[Done] -- [+] -- [-] .
Clicking [+] moves the scroll thumb
and two blue lines 1 pixel down in the image while
clicking [-] moves them 1 pixel up.
Clicking [Done] removes the Horizontal
Size Edit poup and returns control to the Operations Submenu.
Backward to Chapter 5, section 5.4
Forward to Chapter 5, section 5.6